Configuring Your CI Pipeline
In Codesphere, the CI Pipeline is the central Infrastructure as Code (IaC) recipe that defines how a landscape is built and deployed.
This guide will walk you through creating and configuring your pipeline using the ci.yml file.
What is the ci.yml?
The ci.yml provides a standardized format to define your Landscape. It acts as the central Infrastructure as Code (IaC) recipe that defines how your environment is built, what resources it requires, and how its services are orchestrated.
The file consists of two primary sections:
- prepare: Defines the runtime environment, installs dependencies, and builds your application. This stage prepares the persistent shared filesystem.
- run: Defines the deployment artifacts (services), their compute resources, and their runtime configuration (ports, health checks, and environment variables).
What is a CI Profile?
A CI Profile is a unique version of your ci.yml configuration. When you create a new profile, Codesphere generates a corresponding configuration file in your project root (e.g., ci.dev.yml, ci.prod.yml).
This allows you to customize specific behaviors for different environments:
- Build Steps: Run specific tests or build scripts for different stages.
- Run Commands: Start your app with different flags (e.g.,
--debugvs.--prod). - Services: Spin up different services & runtimes (like a dedicated Redis for Prod vs. a shared one for Dev).
Learn more about CI Profiles
Selecting a CI Profile
Before defining your steps, you must decide which profile you are editing. CI Profiles allow you to have different configurations for different environments (e.g., Development vs. Production) within the same project.
- Navigate to the Landscape Config Editor in the CI & Deploy section of your Landscape.
- Locate the CI Profile dropdown menu at the top of the editor.
- Select a Profile: Choose an existing profile (like
Default,dev, orprod) to edit.
Any changes you make in the editor (adding steps, changing resources) will only apply to the currently selected CI Profile.
Defining Your Steps
You can configure your pipeline using the visual interface or by editing the code directly. Both options update the same underlying file.
- Visual Editor
- Code Editor (YAML)
Using the Visual Editor
The Visual Editor divides your pipeline into two main blocks:
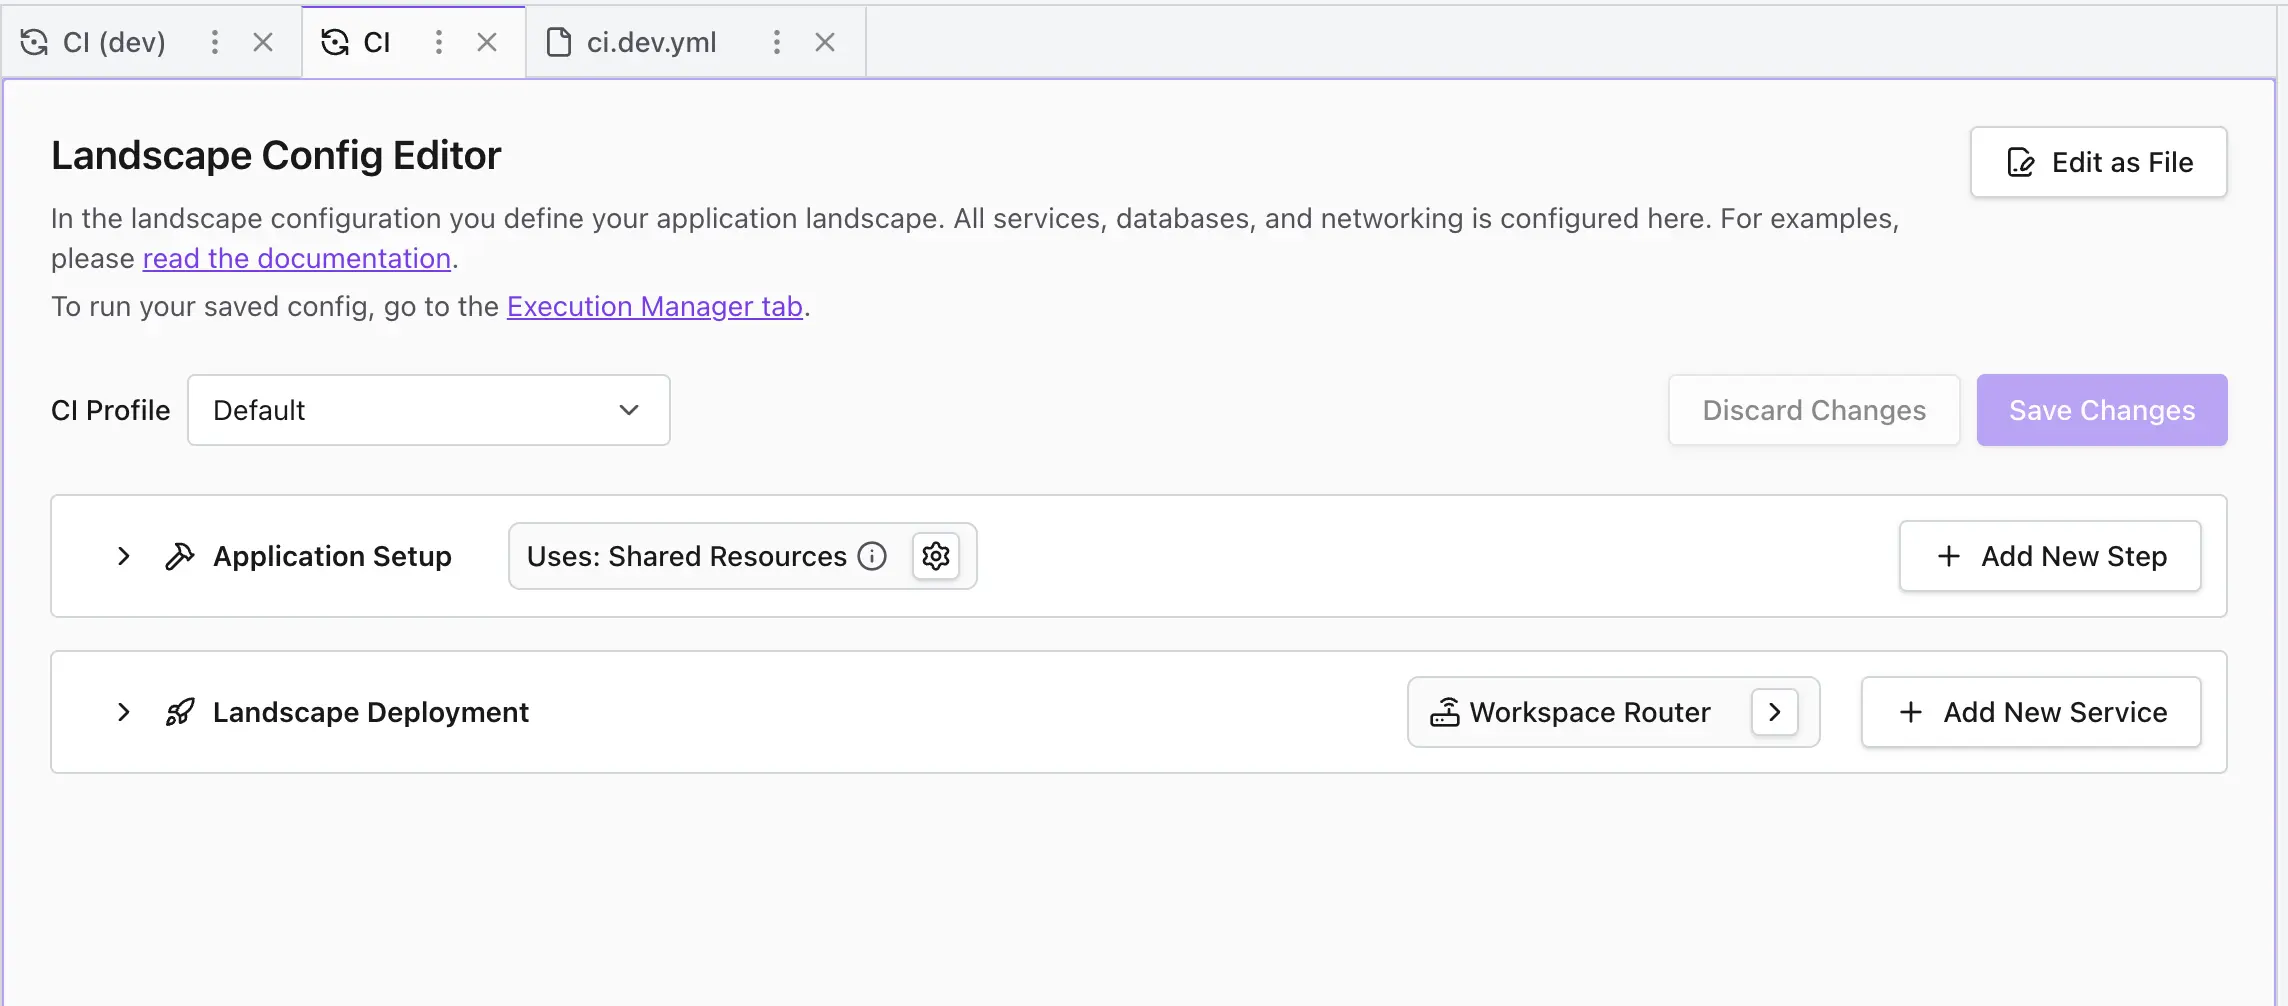
1. Application Setup (Prepare Stage)
The Application Setup (or prepare stage) is an optional phase used to initialize the shared filesystem before any landscape services are initialized.
Codesphere allows direct modification of a persistent filesystem to install dependencies or compile assets without the overhead of full container rebuilds. This is ideal for rapid development, while production profiles often leave this stage empty to maintain the integrity of pre-built immutable images.
- Execution Environment: Steps in this stage execute on the IDE Pod’s resources. This shared compute environment is responsible for all filesystem-level preparation.
- Bash Commands: Supports any standard bash command. Click + Add New Step to run logic like
npm install,nix-env, or specialized build scripts exactly as you would in a terminal. - Persistence: Any modifications made within
/home/user/app/persist across the shared filesystem mount. - Execution Logic: Because the filesystem is persistent, the
preparestage only needs to be triggered when there are changes to the build logic or dependencies.
Changes made to the file system within /home/user/app/ are saved into the persistent and shared filesystem mount. You don't need to re-run the prepare stage every time you deploy—only when build steps change.
The separate "Test Stage" has been removed from the pipeline. You should now integrate your testing and linting commands (e.g., npm test or pytest) directly into the Application Setup steps.
2. Landscape Deployment (Run Stage)
The Landscape Deployment (or run stage) defines the orchestration of the additional runtime and service instances your application requires. Unlike the sequential prepare stage, these services execute in parallel and include self-healing capabilities.
- Service Orchestration: Each service operates as an independent infrastructure component (e.g., a web server, worker, or database). Learn more about available Runtimes.
- Self-Healing: Services are monitored by the platform; if a process crashes or exits unexpectedly, Codesphere automatically attempts to restart it.
- Service Configuration: Use the Settings (gear icon) to define technical parameters:
- Runtime Config: The Start Command and base image.
- Resources: Allocation of compute plans (Micro to Pro).
- Networking: Configuration of internal ports and their mapping to public or private routes.
Validating and Saving
Once you have finished editing your configuration:
- Click Save Changes in the top-right corner.
- Refresh the Visual Editor: the visual editor will automatically refresh to reflect your updates.
- Verify Steps: Navigate to the Execution Manager tab to ensure all your steps are listed and configured correctly.
Using the Code Editor
If you prefer working with code, click the Edit as File button in the top right corner of the editor panel.
A basic ci.yml consists of two main stages: prepare and run.
Prepare Stage
This stage runs immediately after your code is cloned. It is used to install dependencies and build your project.
Example:
prepare:
  steps:
    - name: Install Dependencies
      command: npm install
    - name: Build Application
      command: npm run build
Changes made to the file system during the prepare stage are saved into the persistent and shared filesystem mount. You don't need to re-run the prepare stage every time you deploy—only when build steps change.
The separate "Test Stage" has been removed from the pipeline. You should now integrate your testing and linting commands (e.g., npm test or pytest) directly into the Application Setup steps. This ensures your code is validated as part of the preparation process before services are initialized.
Run Stage
The run stage defines the landscape services your application requires, the specific runtimes they should use, and their orchestration parameters. Services in this stage execute in parallel and include automated health monitoring to restart processes on failure.
Example:
  type-sense-server:
    steps:
      - command: ./typesense-server --data-dir="$(pwd)"/typesense-data
          --api-key=$TYPESENSE_API_KEY --enable-cors
    healthEndpoint: http://localhost:8108/health
    plan: 301
    replicas: 1
    mountSubPath: typesense-data
    network:
      ports:
        - port: 3000
          isPublic: false
        - port: 8108
          isPublic: false
      paths: []
    env:
      TYPESENSE_API_KEY: xyz
Validating and Saving
Once you have finished editing your configuration:
- Save Changes press
Cmd + S/Ctrl + S - Refresh the Visual Editor: refresh the visual editor to reflect your updates
- Verify Steps: Navigate to the Execution Manager tab to ensure all your steps are listed and configured correctly.